Diffusers 0.3 新增圖生圖、Textual Inversion 等功能
What's new in Diffusers? 🎨
Hugging Face 團隊介紹 Diffusers 0.3 的功能更新,涵蓋圖生圖、Textual Inversion、實驗性修補管線及推理優化。Textual Inversion 可用 3-5 張樣本個人化 Stable Diffusion;啟用優化後,Stable Diffusion 僅需 3.2GB VRAM,生成結果相同但速度降低 10%。
Diffusers 0.3 把圖生圖、模型個人化等功能更新,連同小顯存、Mac 與 ONNX 的操作示例一併呈現,便於對照 Stable Diffusion 在不同環境的操作與部署方式。
一個半月前,我們推出了 diffusers,這個函式庫為不同模態的擴散模型提供模組化工具箱。幾星期後,我們加入對 Stable Diffusion 的支援;這是一款高質素文字轉圖像模型,並附有任何人都可試用的免費示範。除了耗用大量 GPU 資源,過去三星期團隊亦決定為函式庫加入一兩項新功能,希望社羣會喜歡!本文會概述 diffusers 0.3 版的新功能!記得為 GitHub 儲存庫點星 ⭐。
圖像轉圖像流程
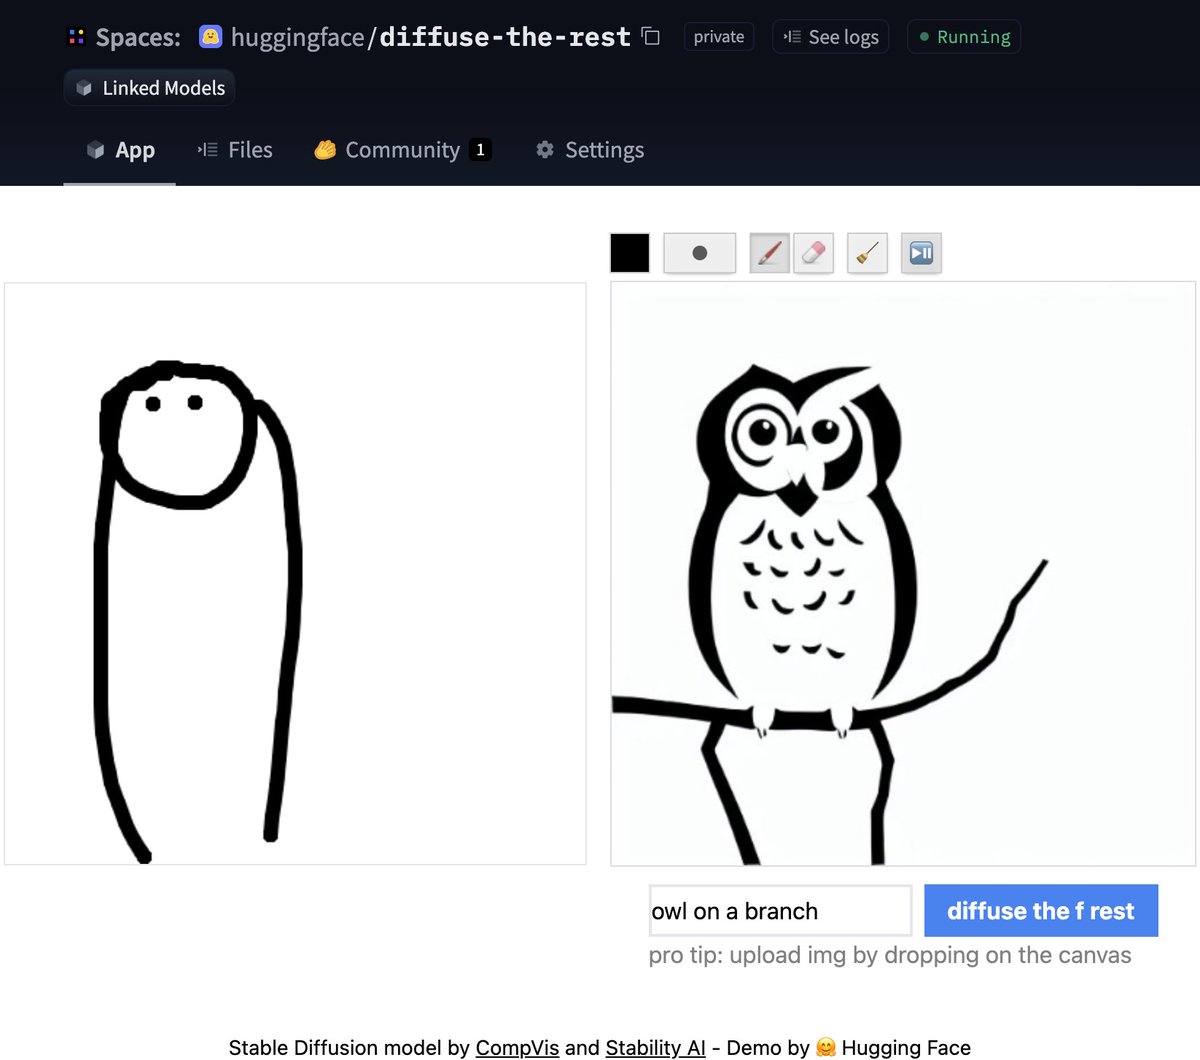
圖像轉圖像生成功能是最多人要求的功能之一。這個流程讓你輸入一張圖像和一段提示詞,並根據提示詞生成新圖像!
來看看根據官方 Colab 筆記本編寫的程式碼。
from diffusers import StableDiffusionImg2ImgPipeline

pipe = StableDiffusionImg2ImgPipeline.from_pretrained(
    "CompVis/stable-diffusion-v1-4",
    revision="fp16",
    torch_dtype=torch.float16,
    use_auth_token=True
)

# Download an initial image
# ...

init_image = preprocess(init_img)

prompt = "A fantasy landscape, trending on artstation"
images = pipe(prompt=prompt, init_image=init_image, strength=0.75, guidance_scale=7.5, generator=generator)["sample"]
沒時間寫程式碼?不用擔心,我們也建立了 Space 示範,讓你可以直接試用。
Textual Inversion
Textual Inversion 只需 3-5 個樣本,就能讓你用自己的圖像個人化 Stable Diffusion 模型。你可以用這項工具針對某個概念訓練模型,再與社羣分享該概念!
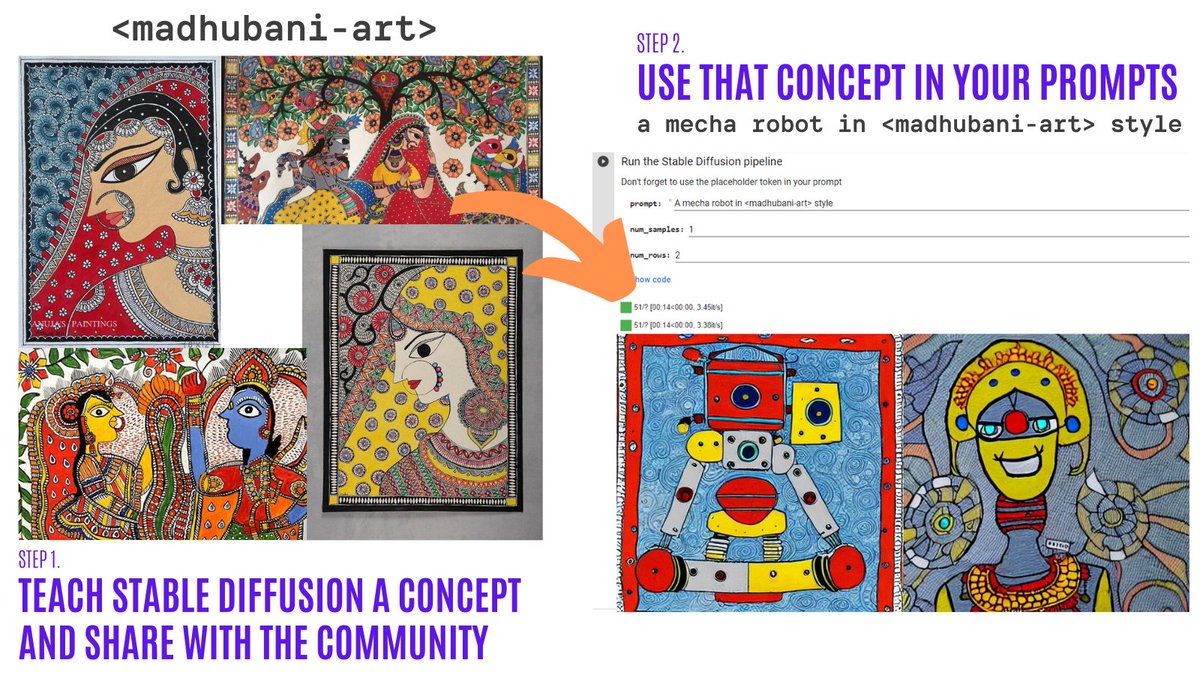
短短幾日內,社羣已分享超過 200 個概念!快來看看!
- 概念所在的組織。
- 瀏覽器 Colab:以視覺方式瀏覽並使用社羣建立的 150 多個概念。
- 訓練 Colab:教 Stable Diffusion 學習新概念,再與社羣分享。
- 推論 Colab:使用已學習的概念執行 Stable Diffusion。
實驗性圖像修補流程
圖像修補會先讓你提供一張圖像,再選取圖像中的區域(或提供遮罩),然後使用 Stable Diffusion 取代遮罩所涵蓋的部分。以下是一個例子:

你可以試用精簡的 Colab 筆記本,或參閲下方程式碼。示範即將推出!
from diffusers import StableDiffusionInpaintPipeline

pipe = StableDiffusionInpaintPipeline.from_pretrained(
    "CompVis/stable-diffusion-v1-4",
    revision="fp16",
    torch_dtype=torch.float16,
    use_auth_token=True
).to(device)

images = pipe(
    prompt=["a cat sitting on a bench"] * 3,
    init_image=init_image,
    mask_image=mask_image,
    strength=0.75,
    guidance_scale=7.5,
    generator=None
).images
請注意,這項功能仍屬實驗性質,尚有改進空間。
為較小型 GPU 作最佳化
經過一些改進後,擴散模型所需的 VRAM 大幅減少。🔥 例如,Stable Diffusion 只需 3.2GB!代價是速度降低 10%,但生成結果完全相同。以下説明如何使用這些最佳化功能
from diffusers import StableDiffusionPipeline

pipe = StableDiffusionPipeline.from_pretrained(
    "CompVis/stable-diffusion-v1-4",
    revision="fp16",
    torch_dtype=torch.float16,
    use_auth_token=True
)
pipe = pipe.to("cuda")
pipe.enable_attention_slicing()
這真的令人振奮,因為它會進一步降低使用這些模型的門檻!
在 Mac OS 上使用 diffusers
🍎 沒錯!我們剛推出另一項廣受期待的功能!請閲讀官方説明文件,查看完整指引(包括效能比較、規格等)。
使用 PyTorch 的 mps 裝置後,配備 M1/M2 硬件的用戶便能執行 Stable Diffusion 推論。🤯 設定需求極少,快來試試!
from diffusers import StableDiffusionPipeline

pipe = StableDiffusionPipeline.from_pretrained("CompVis/stable-diffusion-v1-4", use_auth_token=True)
pipe = pipe.to("mps")

prompt = "a photo of an astronaut riding a horse on mars"
image = pipe(prompt).images[0]
實驗性 ONNX 匯出工具和流程
全新實驗性流程讓用戶可以在任何支援 ONNX 的硬件上執行 Stable Diffusion。以下示範如何使用(請注意,這裡採用的是 onnx revision)
from diffusers import StableDiffusionOnnxPipeline

pipe = StableDiffusionOnnxPipeline.from_pretrained(
    "CompVis/stable-diffusion-v1-4",
    revision="onnx",
    provider="CPUExecutionProvider",
    use_auth_token=True,
)

prompt = "a photo of an astronaut riding a horse on mars"
image = pipe(prompt).images[0]
你亦可使用匯出指令碼,直接將 SD 檢查點轉換為 ONNX。
python scripts/convert_stable_diffusion_checkpoint_to_onnx.py --model_path="CompVis/stable-diffusion-v1-4" --output_path="./stable_diffusion_onnx"
新版説明文件
以上新功能都很精彩。作為開源函式庫的維護者,我們深知優質説明文件對降低使用門檻有多重要,讓任何人都能輕鬆試用函式庫。
💅 因此,我們舉辦了一次文件衝刺,並很高興首次發布我們的説明文件。這只是第一個版本,還有很多計劃增補的內容(也歡迎大家貢獻!)。
文件的一些重點:
社羣
在我們忙於上述工作時,社羣也沒有停下來!以下是其中一些成果(並非完整清單):
Stable Diffusion 影片
探索潛在空間並在不同文字提示之間轉換,即可用 Stable Diffusion 創作 🔥 影片。你可以:
- 為同一個提示生成不同版本
- 在不同提示之間轉換
Stable Diffusion Videos 工具可透過 pip 安裝,附有 Colab 筆記本和 Gradio 筆記本,使用非常簡單!
以下是一個例子
from stable_diffusion_videos import walk

video_path = walk(['a cat', 'a dog'], [42, 1337], num_steps=3, make_video=True)
Diffusers Interpret
Diffusers interpret 是建基於 diffusers 的可解釋性工具,具備多項實用功能,例如:
- 查看擴散過程中的所有圖像
- 分析提示詞中的每個 token 如何影響生成結果
- 分析指定邊界框內的內容,瞭解圖像中特定部分
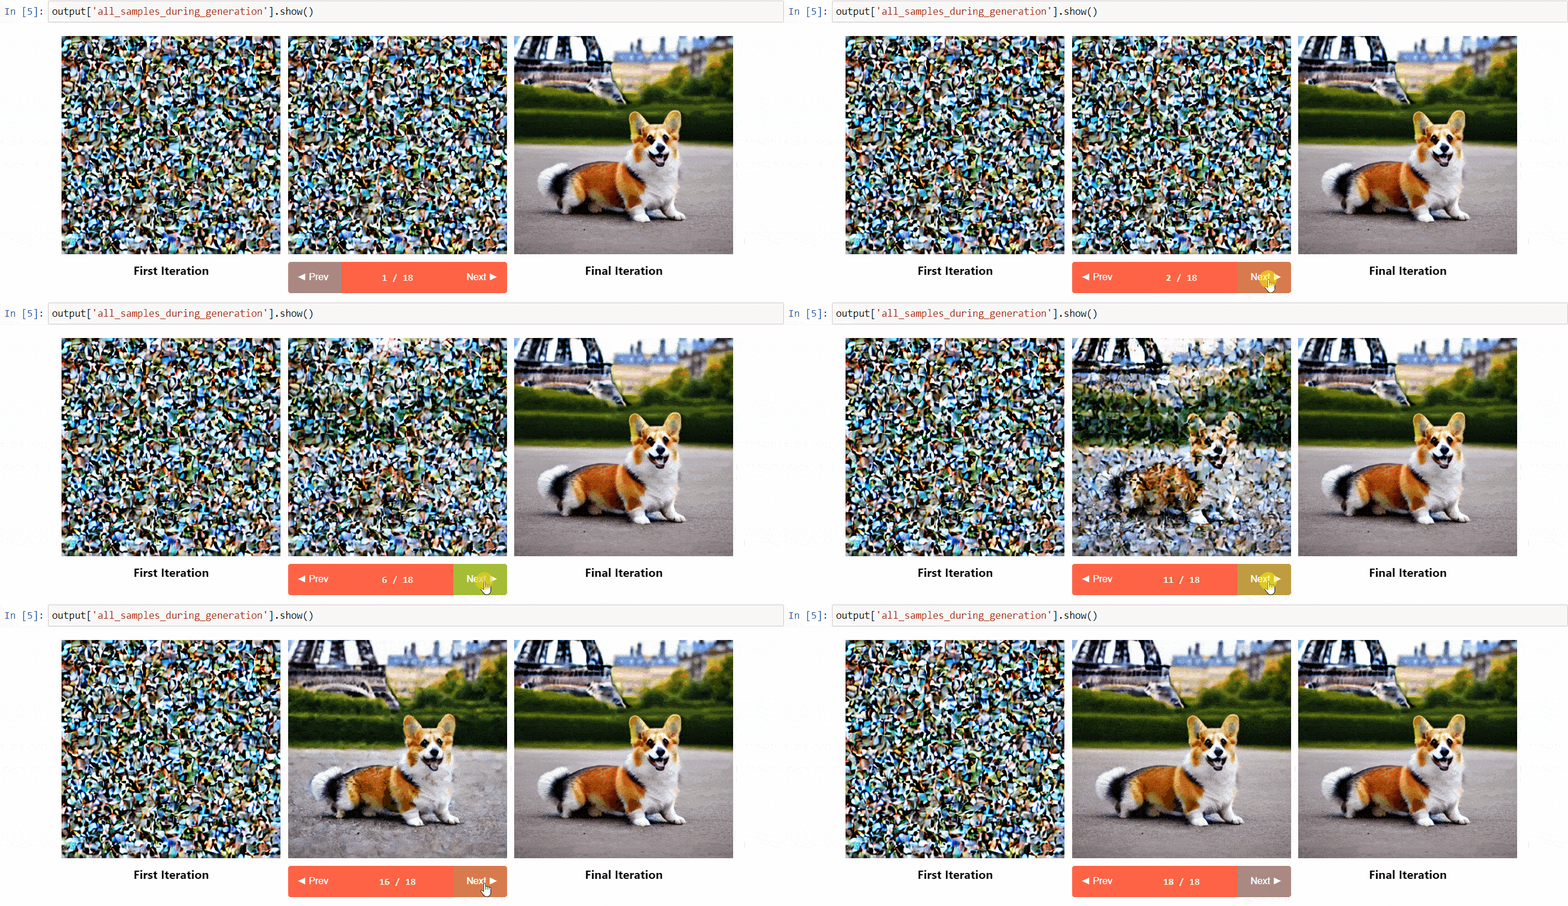 (圖像來自該工具的儲存庫)
# pass pipeline to the explainer class
explainer = StableDiffusionPipelineExplainer(pipe)

# generate an image with `explainer`
prompt = "Corgi with the Eiffel Tower"
output = explainer(
    prompt,
    num_inference_steps=15
)

output.normalized_token_attributions # (token, attribution_percentage)
#[('corgi', 40),
# ('with', 5),
# ('the', 5),
# ('eiffel', 25),
# ('tower', 25)]
日語 Stable Diffusion
顧名思義!JSD 的目標是訓練一個能捕捉文化、身份認同和獨特表達方式的模型。它以配有日語説明的 100 million 張圖像訓練。你可在模型卡瞭解更多訓練方式。
Waifu Diffusion
Waifu Diffusion 是經微調的 SD 模型,用於生成高質素動畫風格圖像。

(圖像來自該工具的儲存庫)
交叉注意力控制
Cross Attention Control 透過修改擴散模型的注意力圖,讓你精確控制提示詞。你可以用它完成一些有趣操作:
- 替換提示詞中的目標(例如把 cat 改成 dog)
- 降低或提高提示詞中字詞的重要性(例如減少對「rocks」的注意力)
- 輕鬆套用風格
還有更多功能!歡迎參閲儲存庫。
可重用隨機種子
Stable Diffusion 早期最令人印象深刻的示範之一,是重用隨機種子來微調圖像。方法是取用感興趣圖像的種子,再配合不同提示詞生成新圖像,效果相當有趣!快來看看這個 Colab。
感謝閲讀!
希望你喜歡本文!記得為我們的 GitHub 儲存庫點星,並加入 Hugging Face Discord 伺服器;那裡設有專門討論擴散模型的頻道。社羣會在該處分享函式庫的最新消息!
歡迎提出功能需求和錯誤報告!能有這些成果,全靠這個出色社羣的支持。
來源:Hugging Face Blog · huggingface.co